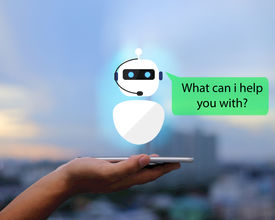
You see them pop up sometimes on websites: That chat window, prompting you into write down your question or start a conversation. The only thing is that by entering your request in the chat box, you won’t get an answer from a human being; you’ll be talking to an algorithm instead.
According to HubSpot, “A bot is nothing more than a computer program that automates certain tasks, typically by chatting with a user through a conversational interface. The most advanced bots are powered by artificial intelligence, helping it to understand complex requests, personalize responses, and improve interactions over time. This technology is still in its infancy, so most bots follow a set of rules programmed by a human via a bot-building platform.”
Sounds a bit complicated, doesn’t it? Not to worry—thanks to different marketing and sales software programs, setting up a chatbot is easier than ever. “Cool,” I hear you saying, then adding, “but why do I need it for my event website?” Fair question.
As Ari Echt-Wilson, Experiment Strategy Marketing Manager at HubSpot, points out, “People are increasingly interested in communicating with brands in a more personal, conversational way—and chatbots can help. Including chatbots on your website helps visitors find what they are looking for and connect them with your team in an immediate, frictionless way.”
Incorporating a chatbot into your event website will help you sustain a conversation with potential attendees, give them important information about your event, and redirect toward them the right resources that will help them decide to register for the event.
In other words, apart from providing a personalized conversational experience for your website visitors, a chatbot might actually encourage people to attend your event. Intrigued? Here’s how you can build your first chatbot:
Step 1. Design the introduction of the conversation
The secret to successful chatbots is to lead people from the first moment of interaction. Don’t just have people write whatever they feel like or ask questions in the chat window. We suggest incorporating a standard opening comment or conversation starter. For example, when closed, the chat window can be titled: “Got any questions? I’m happy to help!”Then, when the chat window is opened, your potential lead can see the following script: “Hi, my name is <insert a chatbot name here >. I’d love to chat with you.” Below that introduction line, you can add three answering options, such as: “Hi, <chatbot name>,” “Good afternoon,” or “Need your help.”
It may sound trivial, but these answering options are a potential attendee’s first contact with the chatbot (and, for the most part, your event website) and it facilitates the conversation. Setting up this welcome message will accompany your potential attendee through the experience and give him or her the necessary framework to have an efficient and quick conversation.
Step 2. Capture the personal information of your (potential) attendee
Another important aspect before starting the “real conversation” is to get the name and email of the person who’s visiting your website. That’s crucial for several reasons. First, the chatbot is a good tool for lead capturing. Second, your team may need to get in touch with this person, and they won’t be able to do it without an email address.
You should capture your lead’s contact information at the beginning of the conversation, using the following script “Hey, before we continue … what’s your name?”
Once the person answers, the chatbot could reply: “Really nice to meet you, <Lead Name>! One more thing: Could you tell me, please, what your email address is, in case we get disconnected?”
If you don’t want to go down this road, you can include another line after your welcome message and offer your lead two options to choose from. Insert the message, “Would you like to ask a question or schedule a meeting with one of our team members?” And then add below Option #1, “Schedule a meeting,” which leads to a calendar, and Option #2, “Talk to the bot.”
Step 3. Segment the audience
The tricky thing about setting up chatbots is overseeing the potential conversations a lead can have. That’s why it’s crucial to identify those people who might interact with the chatbot. For example, you can build different conversations for potential attendees and actual attendees, meaning you’ll have two segments and two conversational flows. To segment the leads, you can add two options: “Already registered for the event” and “Didn’t register for the event.” If you want to have different attendee types, you can personalize the conversation for each category.Step 4. Set up different conversational flows
Each type of lead category may have different questions. Brainstorm with your team and come up with a list of potential questions people may have. For example, a person who didn’t register for the event may ask things such as, “What’s the attendance fee?” or “Is the cocktail dinner included in the fee?” The secret here is to make use of the frequently asked questions and address any possible issues people may have. You can set up the chatbot to redirect the conversation by providing useful links to other event pages that contain the answers. In case there’s an unforeseen question, you could set up the chatbot to redirect the conversation with the message, “A member of our team will get in touch with you in the next 24 hours.”Ready to set up your first event chatbot?
Look, we won’t lie to you: Designing your first chatbot won’t be easy. However, it’s all about trial and error. Feel free to experiment and modify the conversation according to your leads’ needs. But once you’ve mastered it, we promise that you’ll save much more time on event support and be able to transform the chatbot into a real lead capture that gives you enough leverage to persuade people into registering for the event.


